Sunday, July 29, 2012

Avon Lipstick's

Avon lipstick's are very overlooked in my opinion in the beauty world. They are around the price of a Revlon lipstick (anywhere from $5 - $8) but the downfall is that you can't get them at a drugstore! Call your Avon lady, girl! Or you can Google Avon to find a rep. near you. Don't buy straight off the site because then no reps are benefiting. You could if you wanted to, but why not jump at the chance the help a girl out, yah no?

I have 3 lipsticks from 2 different lines.

could not be any truer to color!

Farthest Left: Twinkle Pink (U4) from the Ultra Color Rich line.
I am pretty sure this is their main lipstick line. This lipstick goes on really smoothly and has a frosty finish on the lips even though it looks the sheerest of them all when swatched on the hand. I would call it a simple medium pink. Your not going to have to worry about it settling in the lines & I think that may be due to the finish. Not that this lipstick is drying (because it isn't) but if your looking something to add more moisture and color check out the Moisture Seduction line!

The 2 lipsticks on the right are from the line Ultra Color Rich Moisture Seduction.
To put it very simply, this would be Avon's take on the "Lip Butters". Except they had a year running start. Me personally, I like Avon's way better then Revlon's version. Avon's Moisture Seduction line are both moisturizing and pigmented. I have found Revlon's Lip Butter's aren't much for pigment...or moisture if I am comparing them to the Moisture Seductions! You see that swirl of white going through the Mositure Seduction lipsticks? That's your balm! Most importantly, the lip balm running through it isn't going to compromise the color at all. If anything, it will leave more of a glossy finish. Plus, these smell like punch!

Middle: Tangerine (P302) from the Ultra Color Rich Moisture Seduction line. 
This lipstick is nothing new on Mind Body Beauty. I wore it when I channeled Kourtney Kardash a long time ago & it was also in a trendy blog post about orange/tangerine lipsticks (my favorite summer trend!). This is a cross between an orange and a medium pink which makes it a nice, wearable, coral. This lipstick would be the most with a cream finish out of the 3 but comes off with a little frost (glossy) on the lips.

Right: Perfect Pink (P01) Ultra Color Rich Moisture Seduction line. 
This lipstick looks similar to Twinkle Pink however, this one is a shade or two deeper in color and I would categorize this as more of a berry color as opposed to a true pink. But this does have that same frosty finish. When I say frost, I mean a nice color payoff along with a glossy, shimmery look.


in the same order as shown above, but with different lighting:


If you wanna order from an Avon Book, I recommend looking up swatches of different colors you want online. Their swatches can be a tad bit misleading.

Before I end this, I wanted to talk about the packaging. It is really nice & durable. As far as the quality of the packaging goes, it reminds me of something that may be sold in a department store. Your not going to have to worry about the lipstick falling out. It is in there, like swim wear!

I have another lipstick that I forgot about and didn't get a picture. Oops! It has been in my purse but I think I will have blog post on it somewhere, sometime because it is so pretty.

Have you guys tried these?
Do you know any other great lipstick/moisture duos? 

Thank you for reading!
xoxo
Erica

Friday, July 27, 2012

Healthy Dip n Dots!

When you guys read through this blog post, you are going to laugh and wonder how come you never thought of it! I wish I could take credit for this clever recipe (if you wanna call it a recipe) but I was Pinspired. 

I love Pinterest. 

This is so easy and actually fun! If you like piping frosting on a cake, I have a feeling your going to like this too! If you have kids around, this would be a fun "recipe" for them to do on their own!


Before we get started, here's some things you should know to make this even easier:

*Tip #1: I recommend using yogurt that doesn't have chunks of strawberries in it. The strawberries get stuck and won't come out of the hole making the little dots unpredictable sizes. Either way, it's really no biggie! If you have strawberry yogurt on hand, use it if need be. Just be prepared to have different size dots, like mine.

 *Tip #2: If you have a pastry bag, you can use that instead of the ziplock bag! It would make for really cute dots!

*Tip #3: To make getting the yogurt into the bag easier, grab a cup and place the bottom of the bag into it as you see in the picture. Put the yogurt into the bag, that is in the cup. Get it? That way, when your bag is filled up, you simply grab it out, there's no mess, and the yogurt is at the bottom where we need it. Picture for demonstration purposes only.


Here's what the yogurt should look like in the bag. Your going to cut that corner where you see there isn't any yogurt:

Here's my dot's before they were frozen to give you an idea:

There yah have it! Make your own Dip n Dots! I hope you have a great weekend! I will be back soon enough with a Birchbox review!

xoxo
Erica

Sunday, July 22, 2012

Earn Your T.V. Time!

I was over on the Undressed Skeleton and noticed these workouts! I thought they were a really fun way to get some exercise in and watch my favorite nightly t.v. shows! It is also perfect timing as Keeping up with the Kardashian's is on Later and Teen Mom is on tomorrow. Tweet with me @MeetMissJackson and the Undressed Skeleton @TaraLynnsTweets during the show with the hash tag #Kardashians & #TeenMom


What is your favorite T.V. show?
I wanna make one for Family Guy if anyone loves the show as much as I do!

Thanks for Reading & Don't Forget to Check Out The Undressed Skeleton!

xoxo
Erica

Friday, July 20, 2012

Serious Holy Grail + New Holy Grail Page!


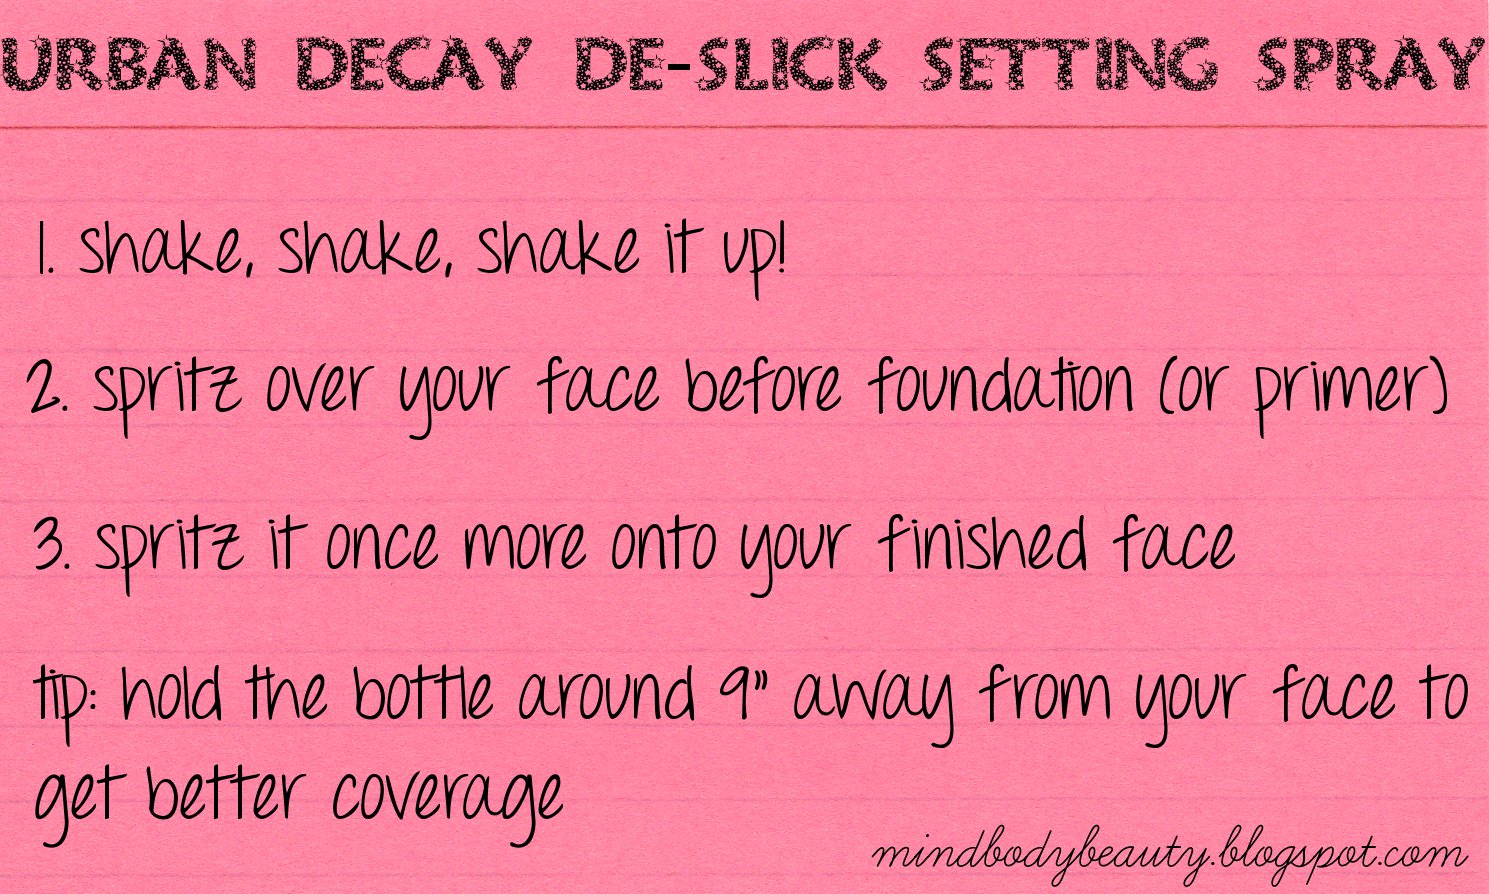
Wow. I have no clue how my makeup braved the summer months without this puppy. In all honestly, it really never did. Sure I used a primer thinking that that was as good as it gets: there's no "perfect fix" for in-tact makeup on summer days. Until now!


I find when I use the De-Slick I don't even need a primer to make my makeup lasts. (If I wanna fill in my pores, that's a different story! I will need a primer!) This seems to hold up on even the hottest, humid days. I got ready, ran errands, came back 5 hours later only to look in the mirror and notice my flawless skin. But wait! That's not my skin! It's my foundation still in the same place I put it hours ago! I knew right then I was hooked on this! 

As for the powder(s) on my face holding up, it was 50/50. All in all, the blush lasted longer than usual but not as long as the bronzer and foundation. Let's just say it will be there until you wash it off!

My mom has even been using it. Every time she walks out the door for 5 minutes, her makeup melts immediately. Since she's been using this, she mentions that nothing else has ever had this effect. Her makeup stays put!

The De-Slick Makeup Setting Spray is the oily skin version! FYI: My face can get oily sometimes so I grabbed this one! My mom's face is not very oily at all and it worked for her! They do have other setting spray's for other types of skin so check your local Ulta! 

Urban Decay teamed up with Skindinavia to create these setting sprays. If you can't find a good setting spray for your skin type with Urban Decay, Google Skindinavia and find their website to see if they have another version of a Setting Spray that may work better for you.


Have you guys checked out my Holy Grail Page?! It has been under construction for a while and I just recently put the finishing touches on it for a great list of great products! Check it out! Let me know what you think!

What is your holy grail must have?

p.s.: I will be back before Sunday night for a really fun Kardashian workout! If your watching the new one on Sunday, spice it up with a corresponding workout! I also have a Teen Mom workout too! Oh yeah! Get exited!

xoxo
Erica

Wednesday, July 18, 2012

Birchbox Freebies!

Can you believe I got $50 worth of great products for free?! I have been saving up my points for over a year now so needless to say, I had a bunch to spend. If you were unsure about how the Birchbox point system works here's a quick breakdown:

  • 10 points = $1
  • you can spend your points in $10 increments

           How can you get points?
  • For each Birchbox you buy = 10 points (even one's you gift!)
  • For each item you get in your box and give feedback on = 10 points

Honestly, it may be my favorite part about Birchbox. You can buy anything on their website with your points. If you have enough points, it will even pay for shipping too! Here's the stuff I purchased was sent! for free! I am sorry, I just love the concept!


Kiehl's Rare Earth Deep Pore Cleanser: I have oily/dry skin. It just all depends. I had a feeling I was going to love it considering they went to the ends of the Amazon River to find White Clay for it. Amazonian clay can actually help with both dry and oily skin so this seemed perfect. It sounds fancy! LOL! It Exfoliates and Detoxifies as well.

My review: I do love exfoliators but I don't want something to be too abrasive on my face considering my skin can also be sensitive at times as well. This cleanser has very tiny exfoliant's in it and was comfortable washing my face. The exfoliant's in it are even tinier than Proactiv's exfolitant's, if you have ever used Proactiv.

Considering this face wash is a clay, I was expecting something less creamy for some reason. It comes out as a clay, then when you start washing your face the clay turns into a milky, soapy face wash. It is really nice! Once I dry off my face I do notice how soft and smooth (& clean!) my skin is and I have really been liking this! Dare I say- It rivals Proactiv any day!


Stila Eyeshadow in Jezebel: If you have seen my Rose Gold post, you would have already seen this eyeshadow. I really love it! I already knew I was going to as Stila eyeshadow's are my favorite to begin with. I have been loving adding this in my crease with a matte cream color on my lid. pretty


Dr. Hauschka's Radiant You Kit: This was the thing that I couldn't decide on when I was ordering everything. The lavender bath isn't for a bath, it's actually to use in conjunction with everything else for a spa like facial. I will be doing a demo or a review at some point because there's something to it. For know if your contemplating trying this out, I say got for it! It's a nice treat!


Are you all signed up for Birchbox?
Have you gotten anything with your points?

Have a fab day!
thanks for reading!
xoxo
Erica


Friday, July 13, 2012

NOTW: Shabby Chic Floral Print

No, this is not a nail sticker. Yes, it is extremely easy to do! Do you guys visit The Beauty Department? You should if you like nail art! That is where I got this idea from!


Nail Polishes used: left to right: SH White On, SH Green With Envy, SH Sun Kissed, Avon Speed Dry in Strawberry. This picture is very true to color.


Quick Review: I hear a lot that it is hard to find an opaque white nail polish. Sally Hansen's White On was quite opaque after the first coat! I did 2 coats just because I always do, but if your in the market for a good white, here's your polish! Plus, it's only like $2.

You will also need: Nail Polish Remover, a piece of paper, & A small eyeliner brush you do not use. They used a normal paint brush. Just make sure your brush is tiny or has a fine point. I used an angled liner brush that I got with the Wet n Wild cream liner. It worked perfectly. I used the very tip of it and had no problems whatsoever.
  1. Paint your nails the base color (white) 
  2. When that dries, add a dab of the first color you want to use (pink) to create your flowers on the piece of paper.
  3. Pour a little bit of the nail polish remover in the cap so it is easily accessible. 
  4. Dip your brush into the nail polish remover 
  5. Transfer the nail polish remover you have on your brush to the pink nail polish on the piece of paper. Mix it together.
-The idea here is to mix 1 part nail polish with 1 part nail polish remover. Once you did so, you will create little flowers on your nails, obviously. The mix will make it look like a faded/watercolor type of floral print.-

        6. Use a dabbing motion when your creating the flowers as opposed to a sweeping motion. That will make them look faded even more so and you may even be able to skip the last 2 steps.    
        7. Once your done with your first color (pink), repeat steps 2-6 for the next 2 colors.  

-It doesn't mention to change out the nail polish remover with each step, but I think that would be ideal. You will notice the nail polish remover will be tinted the colors of your nail polish and we wanna stay away from mixing colors at all costs!-

-I used the same brush for all the colors. If your going to do the same, just be sure that your wiping the brush off really well between each color. I didn't use any soap/water/brush cleanser to clean it off. I simply dipped the brush into the nail polish remover, then wiped it off with a tissue until there was nothing on it.-

        8.  Now your going to add a dab of the white nail polish on the piece of paper. Mix 1 part white nail polish and 2 or 3 parts nail polish remover. 
        9. Make the slightest little dot at the center of each flower with the white mixture. If you have used enough nail polish remover, the white will slowly spread over the flower when you put the drop down, which in turn makes it look faded. I only did this step with some of the flowers. (see step 6)

Ok! Now just add a top coat and your good to go! If your more of a visual person check out The Beauty Department for pictures to go along with the directions! I do recommend checking the real tutorial out, But still read my tips which are in italics to have an even better understanding! I hope I helped! I have a feeling im all over the place! LOL!

Good Luck!
xoxo
Erica


Thursday, July 12, 2012

Anti-Aging, Weight Losing, Beverage.

Since I have decided to get healthy, I have been drinking my healthy potion every morning. I am not a nutritionist & I am not good with medical jargon, if you will, so I took it upon myself to explain it with bullet points, in layman's terms. The coolest thing about this drink I think is that it will literally burn fat. That's amazing.


Before last week, I used to just grab a plain green tea pack. But, I found these little gems of green tea in different flavors. They have 4 flavors in all but I ended up getting the Mango one and the Acai Berry & Blackberry one. 2 for $3! This was great for me because I am not a huge fan of green tea. I just know I need to drink it because it's good for me. 

Quick review on Bentley's Green Tea: As soon as I opened up a mango packet I smelled mango. It tastes like both green tea and artificial mango. I personally think it is a better option then just regular green tea.

So I was looking for something to put together in the morning that would speed up my metabolism, & give me energy. If your on the same journey, look no further!


1. 1 bag of green tea (or 2!)
2. the juice of 1/2 a lemon (or a full lemon! I use 1/2)
3. 1 tbl. honey
4. dash of cinnamon


Good To Know 
-It's a tangy, sweet, & spicy super drink!

-Weather you drink lemon water or green tea with lemon in the water, it still counts as water since green tea doesn't have caffeine or sugar in it.

-Remember, to get the benefits of the green tea, you must drink it normally! I have a cup every morning.

-I like it warm because I think it is better for you that way: especially with the lemon in it. Don't quote me but I am almost positive. Follow the links to find out more info about everything! It is actually pretty interesting stuff!

-It can replace your caffeine!  I usually have a cuppa coffee or a small glass of coke along with it but sometimes nix those and I feel just as energized!

-Lemon Juice in hot water is believed to clear the digestive system and purify liver as well. Sounds good for any hangover!

-The Green Tea has a lot of antioxidants, and that the stuff that reverses the signs of aging.

-When I started digging deeper I started to realize that even though these ingredients do amazing things when consumed alone, the benefits when you combine them are even better.

"a few human studies that have shown that drinking at least two cups of green tea daily inhibits cancer growth."- link

"Honey is nature's energy booster, Honey is a great immunity system builder,  Honey is a natural remedy for many ailment" link


disclaimer: I am not a nutritionist. If you have a question, feel free to ask but I may not have an answer! If you however do have answer to a question please leave it below for everyone! For more info, follow the links!

Sources:
Cinnamon 1 & 2
Lemon Water

Whats your Favorite morning energy booster?

Thanks For Reading!
xoxo
Erica
Related Posts Plugin for WordPress, Blogger...